|
|
Post by Danny California on Jan 26, 2009 21:18:33 GMT 1
Just looked through this one, I like it so far!
I always thought you had to cut a chunk out of the right hand side of the engine bay at the front of the head to make it fit? Or maybe thats because you havnt fitted it in the normal position?
|
|
ljonez
turbo
   Built not bought
Posts: 3,734
|
Post by ljonez on Jan 27, 2009 0:08:06 GMT 1
its mounted slighty lower down and further back than a few others which has allowed the clearance.
|
|
ljonez
turbo
   Built not bought
Posts: 3,734
|
Post by ljonez on Jan 28, 2009 21:04:54 GMT 1
i have now cut the corner out of the sump and plated the hole to allow tie rod clerance. it was a absolute pain in the peach of a job kept finding little pin holes in the weld which had to be re welded  its done now tho thank god. when it comes to the next vtec i'll let some one else do it or move the tie rods. will try get some pics up waiting for batterys to charge at the monent  also im currently in talks with my father to put the engine in the cooper as technicly it is his. if this engine doesnt go in the cooper that will be my next project ;D granted its not sold first |
|
|
|
Post by dai9fxey on Jan 28, 2009 22:47:14 GMT 1
Those darn pinholes get everywhere.
I suppose you've got to be extra fussy due to it being a sump.
The tin in the sump can't be that heavy a gauge.
|
|
ljonez
turbo
   Built not bought
Posts: 3,734
|
Post by ljonez on Jan 28, 2009 23:01:54 GMT 1
yeah it was a complete nightmare, had to weld it up >fill with water > look for leaks> weld pin hole> fill with water etc etc etc etc found that the heat of welding pin holes would cause expansion and create more  finally got it done tho. also i painted the inside of the seam with POR15 which is resistant to oil, petrol, thinners etc, pretty much any chemical and claims it seals pin holes, not that there is any now but thought I'd play it safe as i don't want to be doing it again. |
|
|
|
Post by dai9fxey on Jan 28, 2009 23:13:58 GMT 1
Yep. Do it once and do it right.  |
|
ljonez
turbo
   Built not bought
Posts: 3,734
|
Post by ljonez on Feb 5, 2009 14:41:12 GMT 1
finaly got around to takeing pics of sump 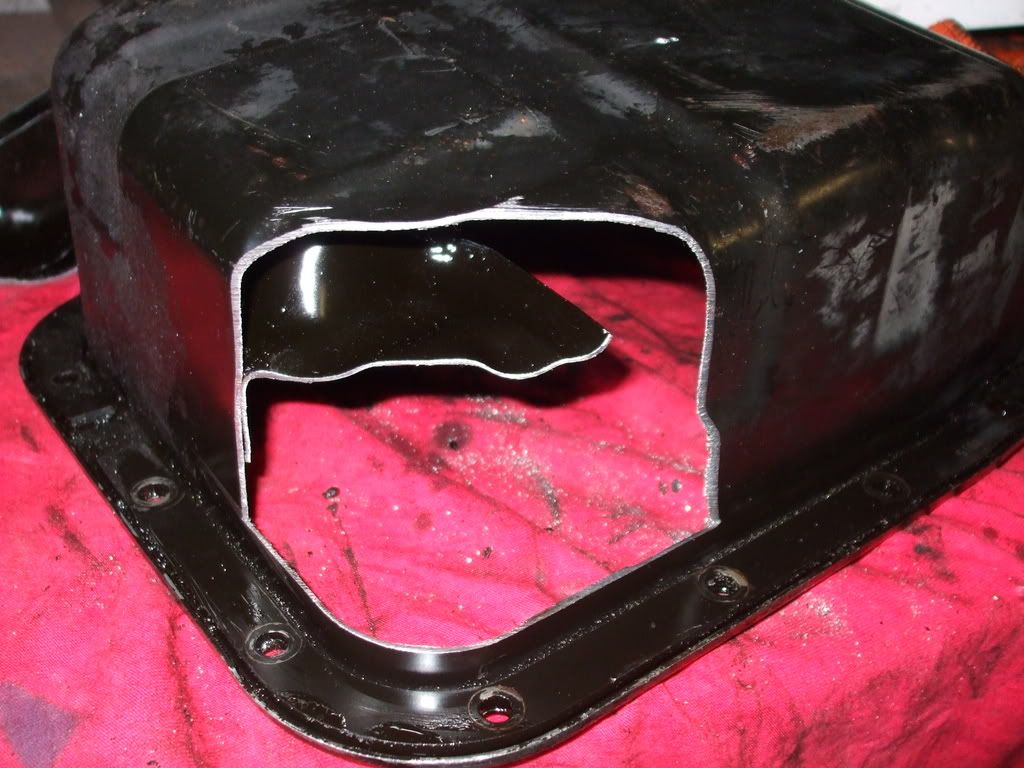 and then plated it up 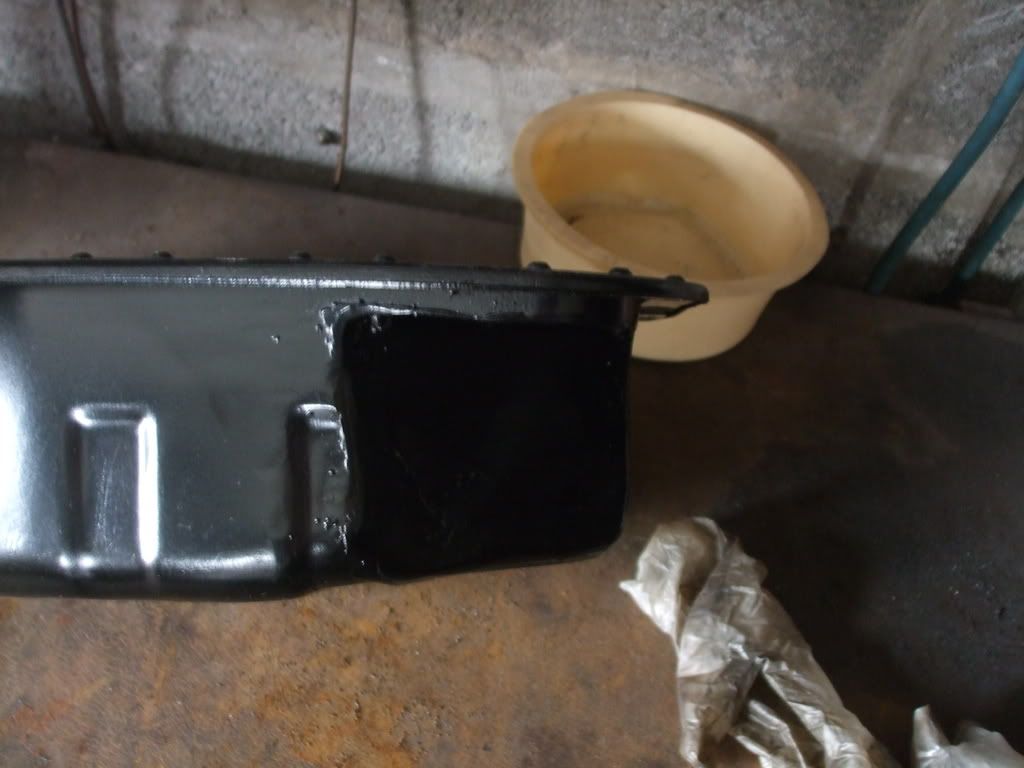 i started grinding down the welds but then decided to leave it as it wont be seen when in the car |
|
ljonez
turbo
   Built not bought
Posts: 3,734
|
Post by ljonez on Feb 9, 2009 21:17:46 GMT 1
pretty pointless update but its very slight progress none the less today i started fabricating the engine steady brackets 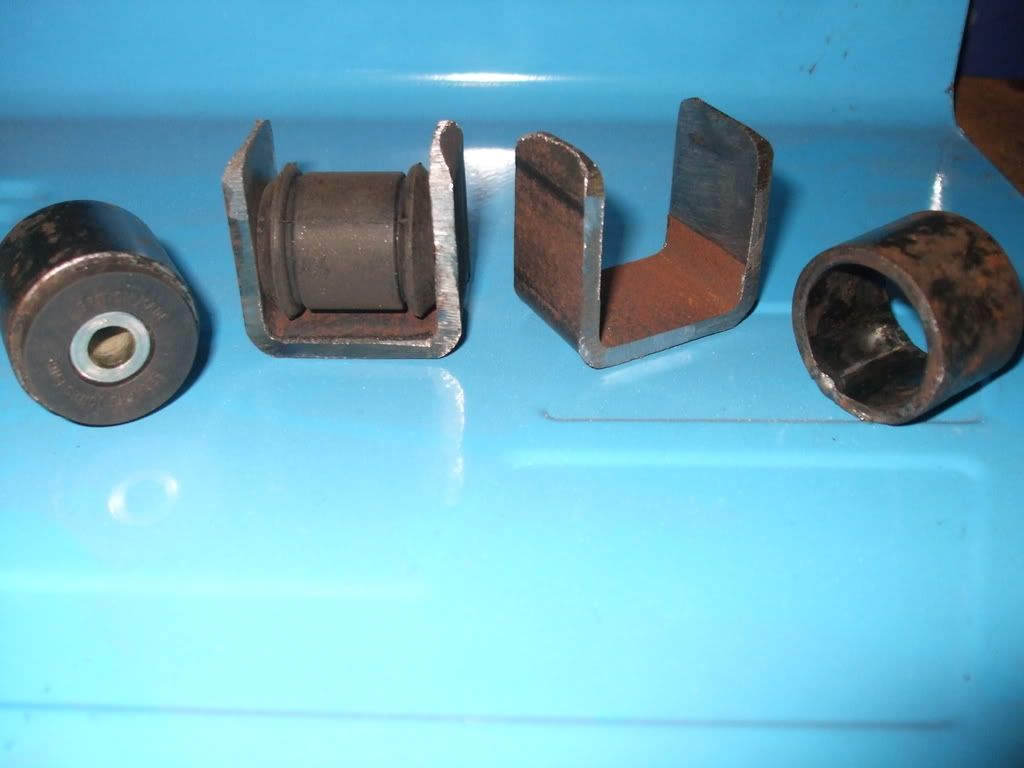 the U shaped steel will welded onto the sub frame and then the round steel which holds the bushes will be welded on to some plate that will be bolted on to the front of the engine and gearbox. theres normal uprated bushes being used for now but when it comes to the final placement of the engine they will be replaced with Polly versions. hopefully I'll get chance to finish them tomorrow and take some pics to show the end result |
|
|
|
Post by bebbinator on Feb 9, 2009 21:21:19 GMT 1
progress is progress no-matter how much you do
|
|
|
|
Post by dai9fxey on Feb 9, 2009 21:58:25 GMT 1
A fairly important bit of progress none the less LJ. All hand made from scratch. That's what you call dedication.  |
|
|
|
Post by Danny California on Feb 10, 2009 0:28:37 GMT 1
They're a nice touch, better than buying something off the shelf and butchering it to fit. Well done.
|
|
ljonez
turbo
   Built not bought
Posts: 3,734
|
Post by ljonez on Feb 10, 2009 20:43:34 GMT 1
didnt get any thing done today as i had to take the mini to be mot'd and it flew thru  means it can now stay on the road abit longer before the vtec goes in |
|
|
|
Post by byron101 on Feb 10, 2009 22:16:24 GMT 1
good to hear mate  |
|
|
|
Post by dai9fxey on Feb 10, 2009 23:55:18 GMT 1
Good news LJ. One less thing to worry about.  |
|
ljonez
turbo
   Built not bought
Posts: 3,734
|
Post by ljonez on Feb 11, 2009 0:13:32 GMT 1
yep only comment the tester had was " the floor on this is very solid for a old mini, what u hiding?" so then we had to explain the whole new bmh shell thing  hopefully i can get on with it know, just have to buy some more welding rods now as i've used the last of my supply, wont be till the weekend now  |
|
ljonez
turbo
   Built not bought
Posts: 3,734
|
Post by ljonez on Feb 17, 2009 22:11:29 GMT 1
managed to do a bit more today  sadly not on the frame/engine steadies but a equally vital part. today i took the civic's internal fuel pump out of the tank and chopped out the mounting flange from the civic tank, the flange was then welded to the top of a spare mini tank Mpi style. with the flange in place i was able to fit the pump but with the civic having a under floor tank the pumps bracket was very short which results in the pick up point being only half way down the mini tank  so the bracket was chopped and extended to place the pump at the bottom of the tank ;D I'll get some pics sorted tomorrow which will explain things allot better. |
|
ljonez
turbo
   Built not bought
Posts: 3,734
|
Post by ljonez on Feb 18, 2009 18:24:05 GMT 1
yesterdays pics spare tank 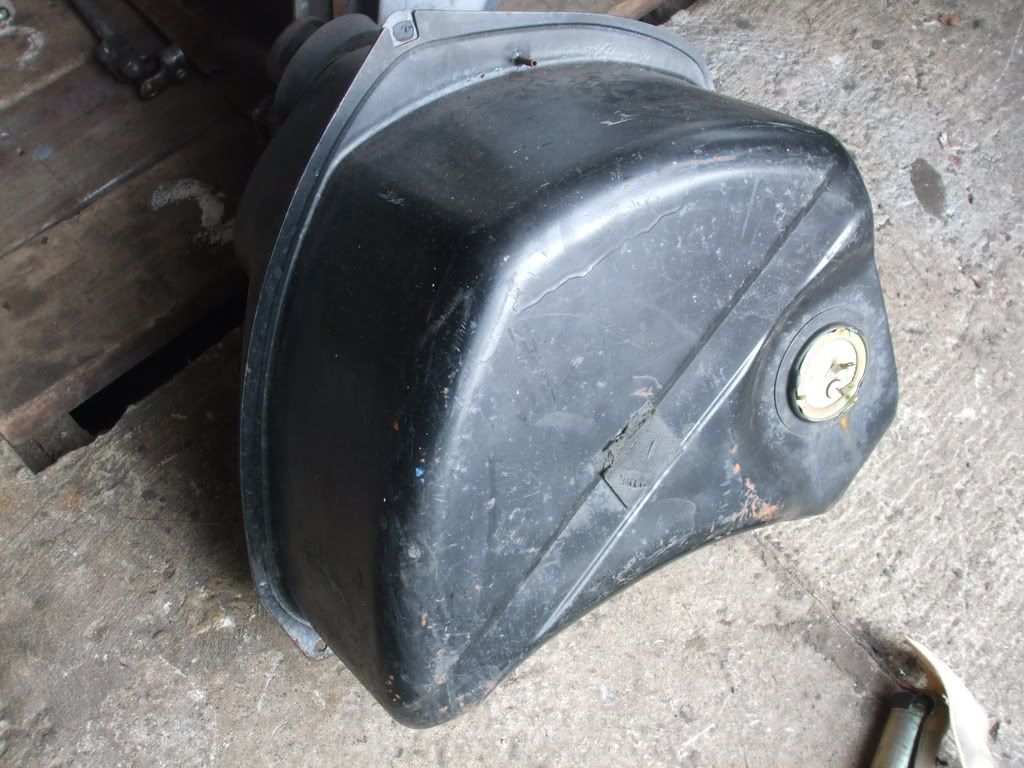 civic pump, cut and lengthed 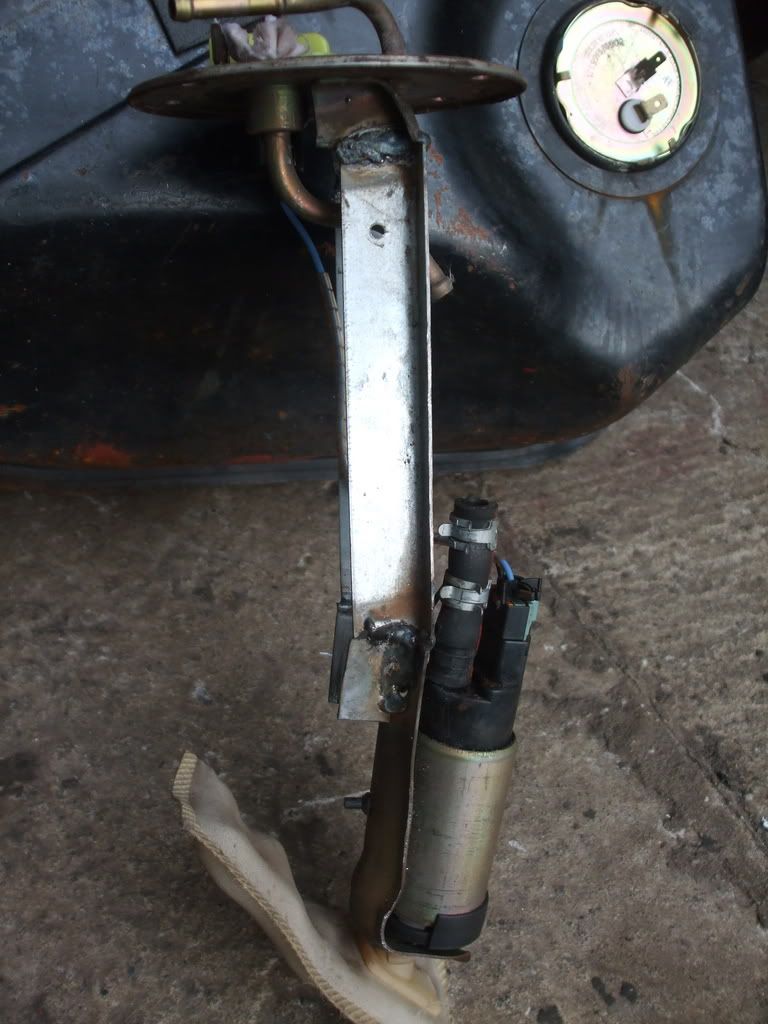 flange cut from civic tank 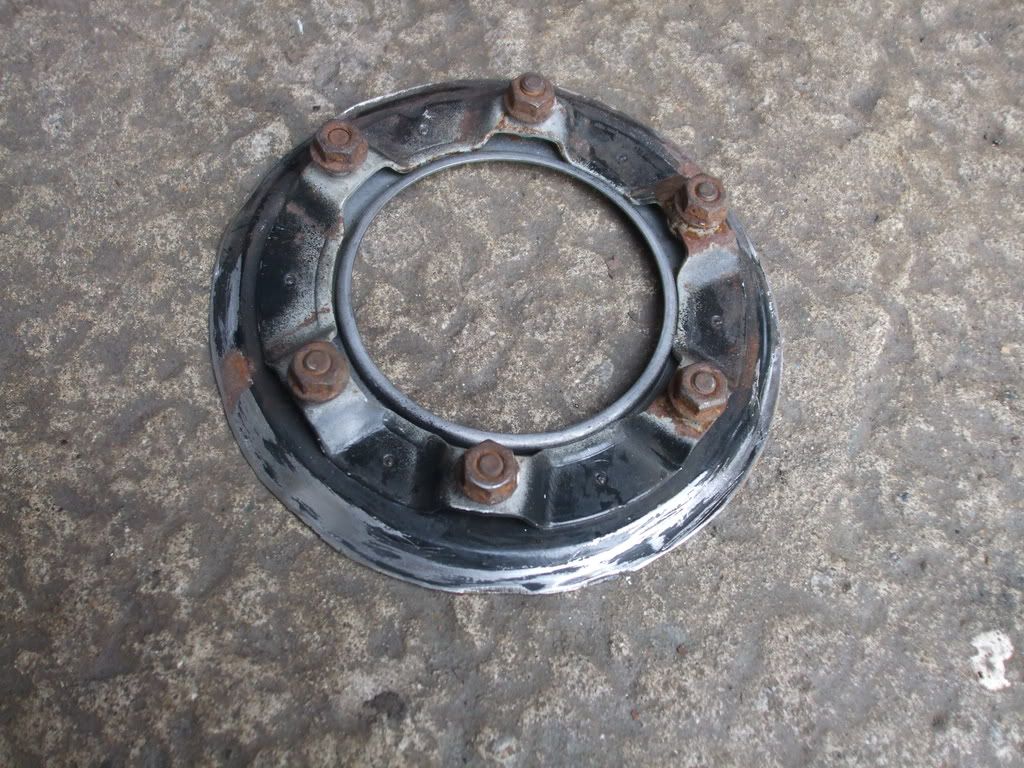 hole cut in top of tank and flange welded in 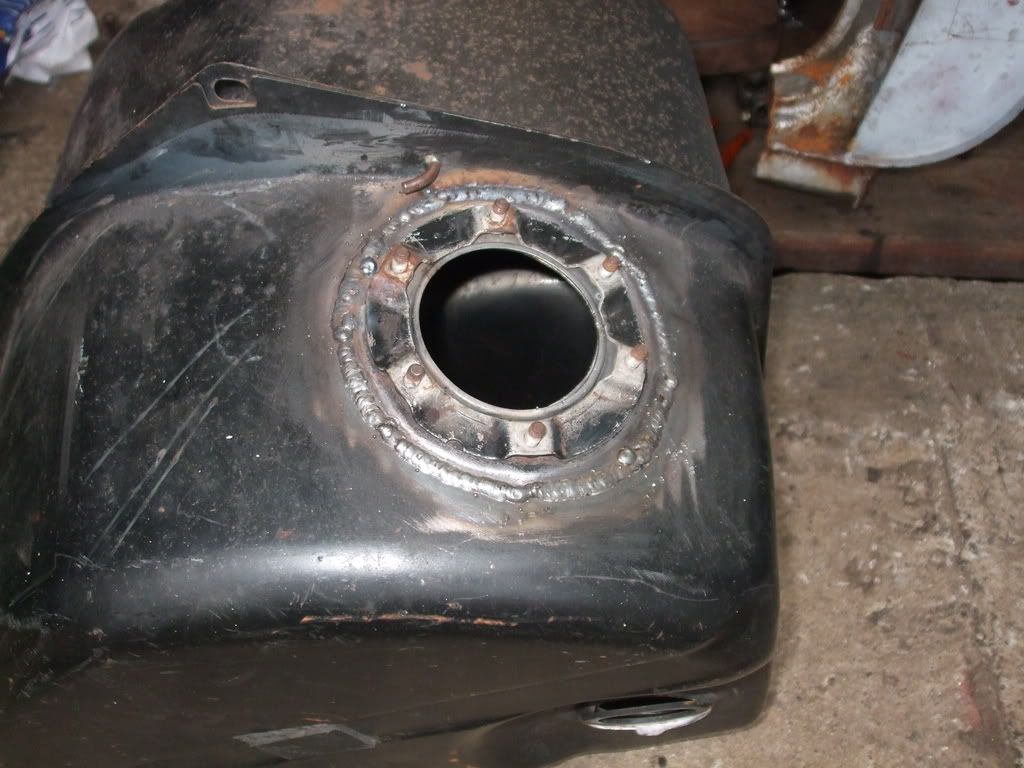 pump in place 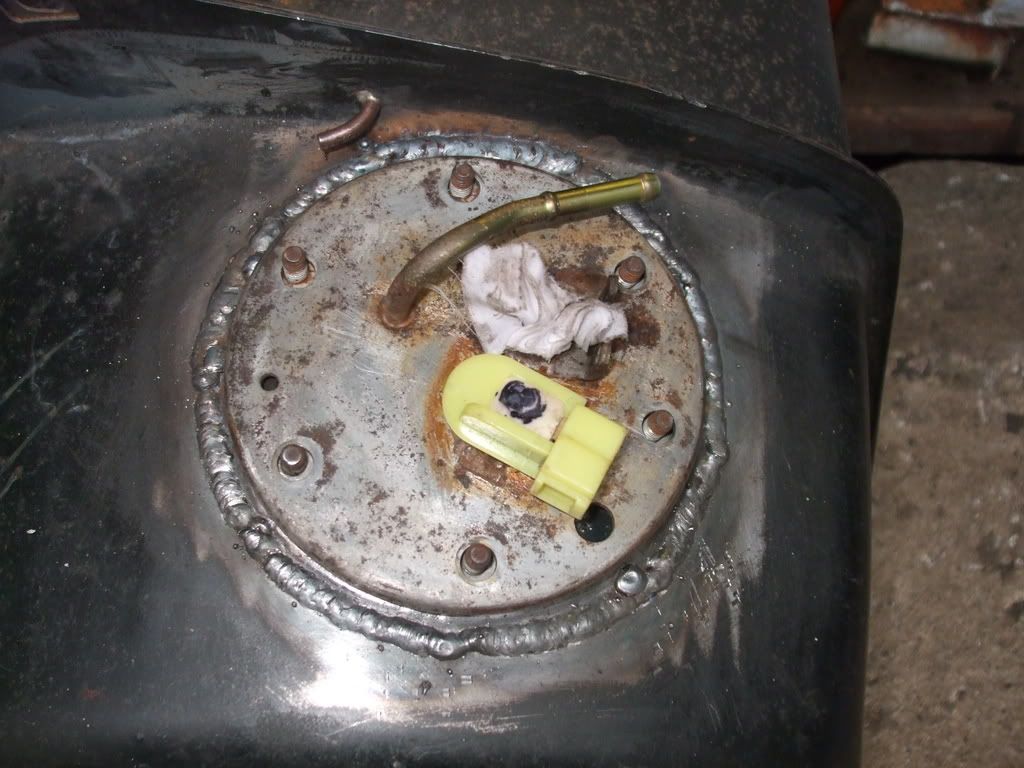 im pretty happy with the final result and it didnt cost a penny  |
|
exuptoy
1330cc
   1980 Rebuild project and 1969 Elf.
Posts: 924
|
Post by exuptoy on Feb 18, 2009 19:05:15 GMT 1
Nice bit of welding there LJ  |
|
|
|
Post by dai9fxey on Feb 18, 2009 21:57:20 GMT 1
Mighty impressive LJ. Personally, i wouldn't know where to start.  |
|
ljonez
turbo
   Built not bought
Posts: 3,734
|
Post by ljonez on Feb 18, 2009 22:07:38 GMT 1
thanks both, personally i wasnt happy with the "look" ( it could be neater) of the weld as i've not done much recently and should have had a little practice first but its as solid as physicly posible and wont be seen when in the car so im not to bothered. maybe im a bit to fussy  |
|