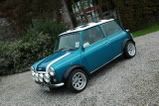
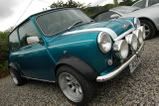
Post by k3rry on Oct 18, 2007 18:47:48 GMT 1
Equipment
1. MIG Welder
2. Spot Welder (optional but recommended)
3. Grinder
4. Tin Snips/Air saw/Jigsaw
5. Clamps and Grips
6. Scribe
7. Cold Chisel
8. Various Spanners
Safety Equipment
1. Goggles
2. Welding Helmet
3. Gloves
Here you go
1. You will need to strip certain things off the front of the car. Before you can start to chop it around and to prevent you from banging your head every five (5) minutes we recommend you remove the bonnet first. Once off store it somewhere safe to stop you from tripping over it and damaging either it or yourself!
2. Side repeaters and wheel arch trim is next, the side repeaters should just pop out whilst most trims are either riveted or screwed on to the arch. If the wing is seriously corroded then u find these just simple fall off.
3. The seam finisher which covers the joint between the A-panel and the wing needs to be prised off and also any retaining clips. Put them to one side as you will need to fit them back on later.
4. The headlights will also need removing. If the front panel is also coming off then you'll also need to remove the side/indicator lights, bumper and grille before you go any further?
5. A pair of tin snips and a decent cold chisel will do the job as well. Use the snips or an air saw to cut the wing away from the A-panel. You need to leave the lip on the A-panel to weld the new wing to make sure you don't cut on the wrong side.
6. Do the same around the front panel join if this is staying on.
7. The wing is attached to the inner wing by a series of spot welds but you will find it easier to first chop the wing off leaving a small lip and then attacking the spot welds with the bulk of the wing out of the way.Hammer and cold chisel will do the job just as well.
8. If they are the original wings, you will also find some spot welds between the wing and the scuttle. Again, cut it out roughly with the tin snips and drill out the spot welds once the wing is out of the way.
9. With the bulk of the wing now out of the way,use a spot weld drill.These can be bought from most good tool outlets, to drill out the welds from around the A-panel,scuttle front panel,and along the inner wings. Take care not to drill through both panels;you are only trying to drill through the top panel.
10. Once all the welds have been removed clean up the lip with a grinder. This is to remove any traces of the spot welds as well as any remaining surface rust. If there is a lot, try treating it with some rust killer before welding on the new metal work.
11. Do the same to the A-panel,scuttle and front panel lips ready for welding. If any of these areas are badly corroded you'll need to cut out the offending rust and replace it with fresh steel otherwise the new wings will very quickly start to rot.
12. The first job is to clean the paint from all the edges of the wing where they will be welded to the car - and that means both sides if you are going to do it properly and use a spot welder. If you are plug or seam welding them on then just clean one (1) side
13. Before the panels are fitted,spray the faces that will be hidden with some weld through zinc primer, this will slow down the rusting process helping to make the panels last much longer. You should be able to get this spray from most tool shops.
14. If you are using a spot welder, you will also need to clean the paint off the back inner wing lip; this will ensure the welder can conduct through the metal properly giving you good strong weld that penetrates right through.
15. If the front panel is still on the car then this will have to be done with the wheels off and the car supported on axle stands. As we are removing both panels its easier to clamp the two (2) together with them laying on the floor. Put some cardboard down to stop them from getting too scratched.
16. Take your time in getting the wing and front panel lined up correctly, and then once you're happy with the fit of both wings try the bonnet on and check the gap. Make any adjustments now because once you start to weld there's no going back. The wing and front panel should both be flush so use your eyes and hand to double check.
17. Out comes the spot welder. Place a series of welds every inch or so making sure the two (2) panels are securely clamped together. If you are using a MIG it is possible to plug weld along the lip or run a weld along the edge but this can lead to panels pulling apart so we always recommend getting a spot welder on the job, even if it means hiring one (1) for a few days.
18. With the panels now on the car, fit the sub frame mounts and push the wings as far back and as tight to the inner wing as possible. Do this on both sides and don't worry if the wings don't line up perfectly with the A-panels we'll sort it later.
19. With both wings pushed as far in as possible, place a couple of tack welds into each corner so that you can remove the clamps. Do a small tack for now as you may need to make some adjustments.
20. Once the clamps are off, you can then place the bonnet back into position and check the gap down each side. If it is not satisfactory then grind through the spot welds and try again. It is sometimes necessary to trim the lip on the wings so that they can sit closer in, but every car is different.
21. If all is OK then use a series of clamps to hold the wing securely against the inner wing lip and spot weld it into place, or use the MIG welder to either plug weld or stitch weld the wing on. Move the clamps along as you weld to ensure there is no gap.
22. Once the full lip is welded you can then start on the A-panel joint. With the wing and A-panel lined up, place a decent clamp right at the top to pull the two (2) lips tightly together, this should eliminate and gap between the scuttle and the wing ensuring a nice tight fit.
23. Spot or plug weld the two (2) together but don't try welding the lips with the MIG as they can easily pull apart and it will be impossible to fit the seam finisher unless the weld is ground right back thereby losing all its strength.
24. Just one (1) more place to weld now and that is in each corner of the bonnet opening. Use a MIG welder here and just place a small run of weld in the corner, make sure the wiring loom is pulled well clear.
25. You only need a small amount of weld, too much and it can hit the bonnet when that is refitted. Watch out for the underseal catching fire on the inner wing which is easily accessible through the headlamp opening.
26. Seam sealer - This is used in areas such as the wing to inner wing joint before paint to stop any water getting between the two (2) panels. This can also be applied to the other side of the joint inside the wing.
27. And thats just about it, all thats left to do now is to prep and paint the panels inside and out and then refit the lights and brightwork and your Mini will be as good as new. A good dose of underseal or similar on the backs of the panels should help prolong their life.....


